Practical guide
A meshy ai image to 3d tutorial for your first model
Start with a clear picture, then use Meshyai to work through image preparation, generation, inspection, and export. This guide shows what to check when a convincing preview does not yet make a usable 3D asset.
prerequisites
A little preparation makes the first result easier to judge. Gather the reference and decide what the finished object needs to do before you generate it.
- ReferenceA single image with a distinct subject and visible outline gives the generator a clearer starting point.
- WorkflowMeshyai's image-to-3D process still needs a full rotation check because one photo cannot show every surface.
- OutputA 3D preview is not proof that the mesh, texture, or export suits your intended application.
numbered steps
Use this sequence for a first pass, then repeat only the stage that needs improvement. Keep your original picture so you can compare each attempt against the same reference.
-
1
Prepare and submit the image
Choose a photo or illustration with one prominent object, even lighting, and minimal overlap with the background. Crop away unrelated items without cutting off important edges. In Meshyai, open the image-to-3D workflow, add the reference where the interface requests it, and describe the subject in plain language. State the material and the shape you want preserved; avoid asking the system to invent many unseen details at once.
-
2
Generate and rotate the result
Run the generation and wait for the 3D preview. Compare the front view with the source, then rotate through the sides, back, top, and underside. Look for doubled limbs, missing parts, flattened depth, and textures that merely imitate geometry. Save a promising result before changing your description, so you can tell whether the next attempt is actually better.
-
3
Refine, export, and verify
If the silhouette is wrong, improve the source image or clarify the subject rather than piling on style words. Once the object looks sound from several angles, use the available export option and open the file in the application where you intend to use it. Check scale, orientation, separate materials, and whether the texture travels with the model. A rendered preview alone cannot confirm those properties.
common errors and fixes
Use this checklist before rerunning a weak result. The required checks address problems at the source; optional checks help when the object must meet a specific downstream need.
-
Subject blends into the background: recrop or replace the image so its outer edge is easy to distinguish. — A busy scene can make background objects look like part of the model.
-
Important parts are cropped: supply a reference that shows the whole object, including feet, handles, or other thin features. — The generator cannot reliably recover a shape that is absent from the image.
-
Back or sides look invented: rotate the preview and identify which unseen surfaces need manual correction. — A single view provides limited evidence about hidden geometry.
-
Decorative detail looks painted on: inspect the mesh rather than judging only the shaded front view. — Texture detail and physical depth are different things.
-
Export looks different elsewhere: check material and texture handling in the destination application.optional — Preview lighting may not match your own scene.
Continue with the right next step
Once the first image-based result is ready, choose a guide for using the exported asset, practicing the basics, or comparing possible subjects.
- how to use meshy 3d model Follow the checks that take an exported model from a preview into a practical 3D workflow.
- meshy tutorial for beginners Review the core generation and inspection habits before attempting a more demanding reference.
- meshy examples 3d models See different subject types to help choose an image that fits your first experiment.
Inspect the source and the model
Drag the divider to compare an illustrated plush-lion reference with a generated-looking model view. Treat the pair as a visual example, not as a documented conversion of that exact source.
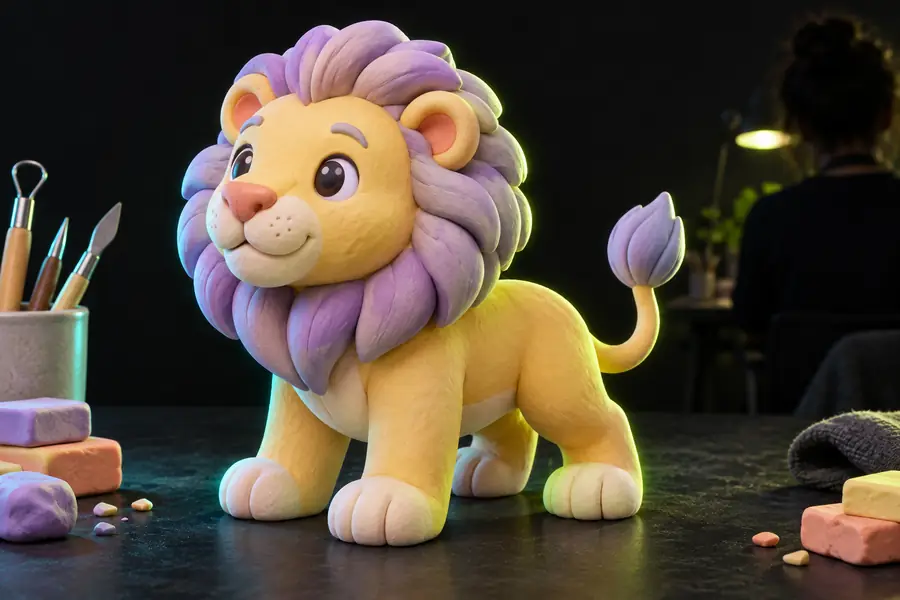
Reference view
Pay attention to the silhouette and face first, then rotate your own result to inspect surfaces this comparison cannot show.
3D example
advanced tips
The best next adjustment depends on where the asset will go. These checks help you refine a promising result without mistaking a polished render for a finished model.
Illustration
Preserve the character of the source
Stylized artwork often contains deliberate exaggeration that a 3D generator may smooth away. In the meshy ai image to 3d tutorial workflow, name the features that matter most: a wide head, short legs, a particular color boundary, or an unusual accessory. Judge the result by those features before adding surface decoration.
- Keep the subject fully visible against a simple background.
- Check whether small accessories connect sensibly to the main body.
- Compare the silhouette at more than one viewing angle.
Game asset
Test the model in its destination scene
An appealing preview may still have an awkward pivot, unsuitable proportions, or geometry that is difficult to edit. After export, open the asset in your target 3D software or engine and inspect it under ordinary scene lighting. If it needs animation, check the structure before spending time on materials.
- Confirm scale and orientation alongside an existing asset.
- Inspect mesh density and separate parts where relevant.
- Verify that textures appear correctly after import.
3D printing
Treat the generated mesh as a starting point
A printable shape needs more than a convincing surface. Open the export in a mesh editor or slicer and look for holes, floating pieces, thin features, and disconnected parts. Repair and size the geometry for your intended print rather than assuming the image-based output is immediately ready for fabrication.
- Check that the intended solid is closed.
- Strengthen fragile protrusions and unsupported details.
- Inspect the sliced layers before committing to a print.
Try your own reference
Choose one object, describe the features that define it, and make a first pass with Meshyai. Rotate the result before exporting, then verify the file in the tool where you will actually use it.
Turn a clear image into a model you can inspect
- Start with one recognizable subject
- Inspect every side of the preview
- Check the exported asset in context
tutorial FAQ
These answers expand on the basic question of how to use Meshyai for an image-based 3D model.
Open the image-to-3D workflow, provide a clear image of one subject, and add a short description of the features you want preserved. Generate a result, rotate the preview to check the unseen sides, and export only after you have inspected the shape.
Use a well-lit image with a complete, recognizable subject and a background that does not obscure its outline. A single view is enough to attempt a model, but it leaves the back and hidden details open to interpretation.
Identify whether the problem is the silhouette, a missing part, or a surface detail. Fix the reference or clarify that specific feature in your description, then compare the new result with the previous one from several angles.
A preview shows how the model appears in one viewer, not necessarily how its geometry and materials behave elsewhere. Open the export in your intended application and check its orientation, scale, mesh, and texture before relying on it.